I phone
The
iPhone is a smartphone made by Apple that combines a computer, iPod,
digital camera and cellular phone into one device with a touchscreen
interface. The iPhone runs the iOS operating system (OS), and as of
2017, there were 2.2 million apps available for it through the Apple App
Store, according to Statistic.

Iphone Settings
Use this to quickly find and access settings in iOS: Open the Settings app on the iPhone, iPad, or iPod touch. At the primary Settings app screen, tap and pull down on the settings screen to reveal the “Search” box at the top of the Settings screen.Sep 22, 2015
How to setup data and MMS APN settings on a iPhone 6
- From the home screen, tap Settings.
- Tap General.
- Tap Reset.
- Tap Reset Network Settings.
- A box will pop up to explain the network settings will go back to factory settings. Tap Reset Network Settings.
Icloud Create

- Open your iPhone’s device settings. Tap “Settings”—the app with a gear icon—from the home screen of your iPhone to open your iOS smartphone’s device settings. Here you can view all the customizable options for your iPhone.
 2. Open the iCloud settings. Scroll down the Settings screen and tap “iCloud” from the list of entries. This will take you to your iPhone’s iCloud service settings where you customize various options for the service.
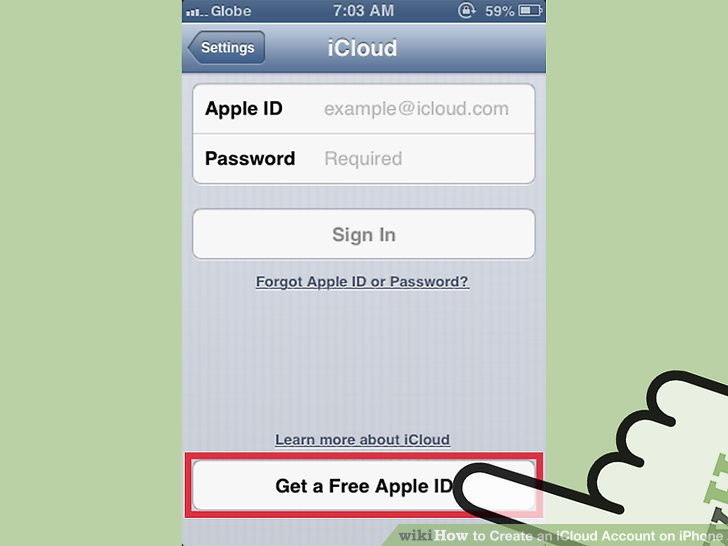
 3.Tap the “Get a Free Apple ID” found on the lower portion of the iCloud settings screen. This will begin the process of creating an iCloud account, and a pop-up menu will show prompting you to enter your date of birth.
- Note that if you already have an Apple ID, you don’t need to create an iCloud account. The iCloud service will readily be available for you. All you have to do is enable it.
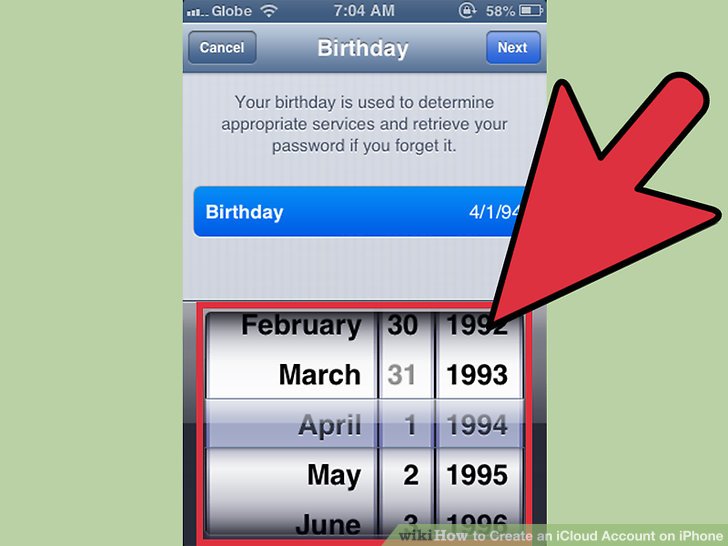
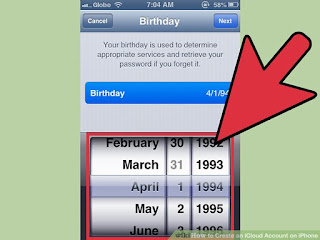 4. Enter your birth date. Just use the scroll buttons you see on the pop-up menu to select your birth date, and tap the “Next” button on the upper right-hand corner of the menu to continue
 5. Enter your birth date. Just use the scroll buttons you see on the pop-up menu to select your birth date, and tap the “Next” button on the upper right-hand corner of the menu to continue
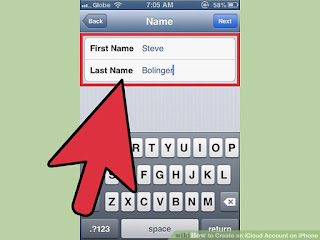
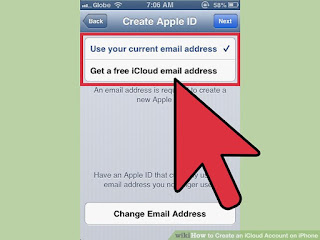 6. Create an Apple ID using an existing email address. The next step will tell you that an email address is needed to sign up for an Apple ID. There are two options here; the first one is to use an existing email, and the second one is to create a new iCloud email address (described in the next step). If you prefer to use an existing email address, tap the “Use your current email address” on the pop-up menu, and you’ll be prompted to enter the email address and its password. After entering these credentials, tap the “Next” button on the top right hand corner to proceed to the Security Question.
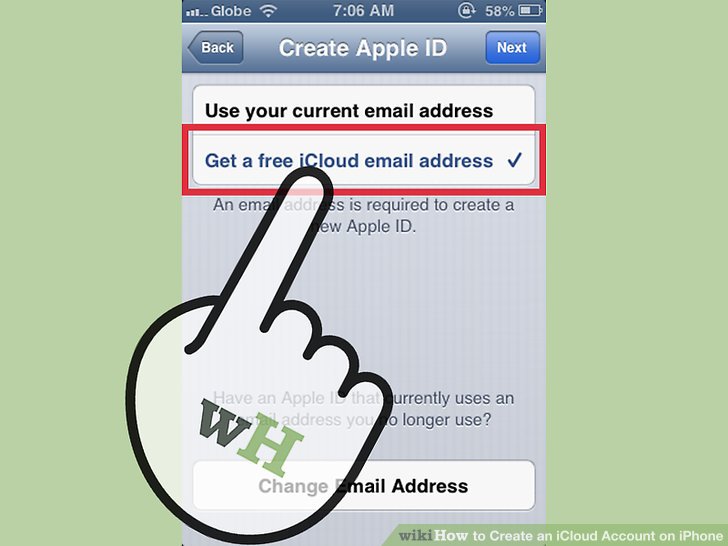
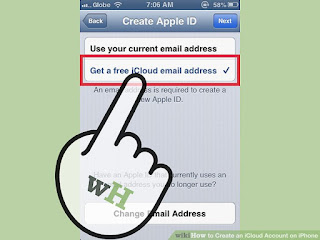 7. Create an Apple ID using a new iCloud email. If you prefer to create a new iCloud email address instead of an existing one, tap “Get a free iCloud email address” and you’ll be prompted to enter the email address you’d like to use for the iCloud account (for example: johndoe@icloud.com).
- Once you’ve written the email address you like, tap the “Next” button on the top right-hand corner of the page, and you’ll be asked to enter a password for the iCloud email you’re about to create. Type in the password you want to use on the “Password” field (your iCloud password must contain a number, a lower, and an upper case letter), and re-type it again on the “Verify” field to confirm. Once you’re done, tap the “Next” button on the top right-hand corner of the pop-up menu once more to proceed to the next step.
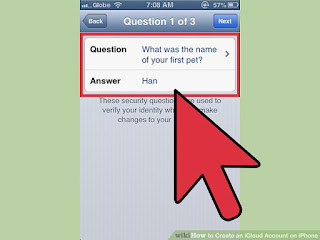 8. Choose a security question. The next step will require you to choose three security questions, which will be asked in the event that you forget your password and try to recover it. Tap the “Question” field and select a security question you’d like to use from a random list of questions that you can use. Tap the “Answer” text field and enter your answer for the security question you’ve picked using the on-screen keyboard.
- Do this for the remaining two “Question” and “Answer” security question text fields. Once you’re done, press the “Next” button again on the upper right corner of the pop-up menu to proceed.
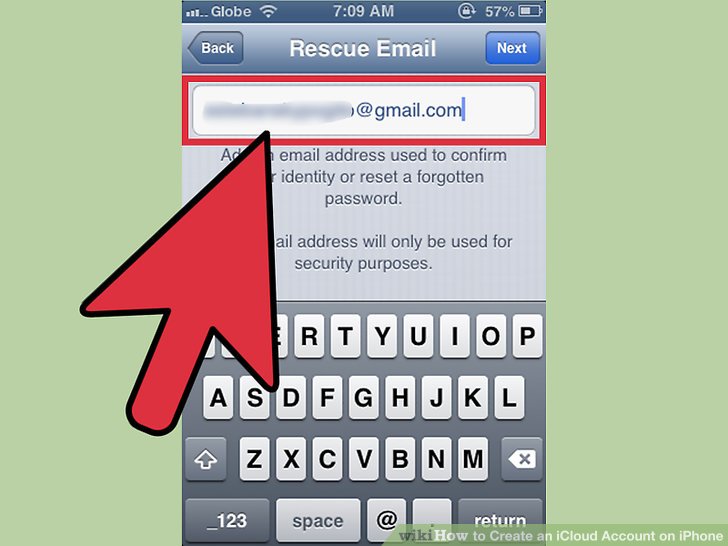
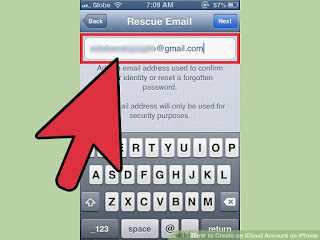 9. Enter a rescue email. The next step will ask you to enter an alternate email address where your iCloud account password can be sent to in case you forget it. Enter the email address you’d like to use on the text field and press the “Next” button to continue to the next step.
- Make sure that the email address you’ll be using here is a live and active one because it will be used for security purposes. If you don’t have any extra email address, this step is optional, and you can just tap the “Next” button on the upper right corner of the pop-up menu to proceed to the next step without entering any email address.
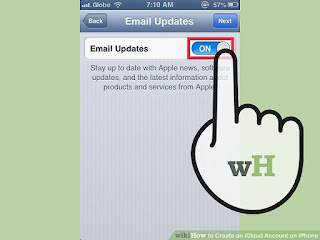 10. Subscribe for an email update (optional). If you want to receive the latest email newsletter on the email address you used to set up your iCloud account, tap the toggle switch and set it to green. Otherwise, tap the switch and set it to color gray. Tap the “Next” button once more to continue.
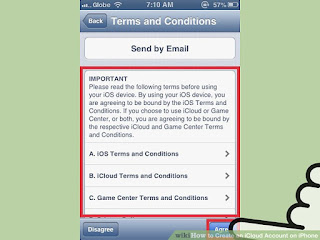 11. Review the terms and conditions. The next step will show you the terms and agreements related to creating an iCloud account. Read the statements you see on the pop-up menu, and tap the “Agree” button on the lower-right corner of the pop-up menu to complete the setup and create your Apple ID.
- Tapping the “Disagree” button instead will close the pop-up menu and cancel all the information you’ve entered from the previous step.
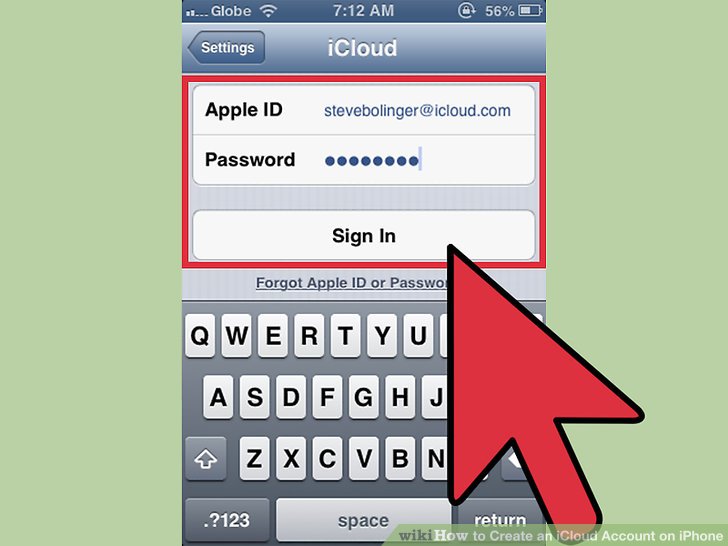
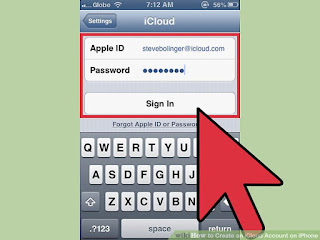 12. Sign in your newly created iCloud account. After tapping the “Agree” button, the pop-up menu will close and redirect you back to the iCloud settings screen. You’ll notice that your newly created iCloud ID is already written on the “Apple ID” text field with your password filled in (but encrypted) on the “Password” field. All you need to do now is to tap the “Sign In” button to start using your newly created iCloud account.